If you’re a developer, blogger, or agency based in Malaysia, setting up a Linux VPS is a powerful way to take control of your web hosting needs. In this guide, we walk you through everything from selecting the right provider to getting your website live, all tailored to the Malaysian context.
1. Why Choose a Linux VPS in Malaysia?
A. Benefits of Local Hosting in Malaysia
Local hosting reduces latency and improves site speed for visitors within Malaysia. This is especially beneficial for businesses targeting a Malaysian audience.
B. Cost-Effectiveness and Performance Advantages
Linux VPS hosting is more cost-efficient than dedicated servers and offers better control than shared hosting. It strikes a balance between affordability and performance.
C. Regulatory Compliance and Data Localization
Hosting within Malaysia ensures compliance with local data protection laws, which is critical for agencies handling client data.
D. Ideal Use Cases (Developers, Bloggers, Agencies)
Whether you’re deploying custom apps, running a content-heavy blog, or managing client sites, a Linux VPS provides the flexibility you need.
2. Preparing for Your VPS Setup
A. Choosing a Malaysian VPS Provider
Look for local providers like Exabytes and Shinjiru, which offer localized support and competitive pricing. For a deeper list of options, check out our reliable VPS Malaysia services.
B. What to Look for (RAM, SSD, Bandwidth, Support)
Prioritize SSD storage for speed, at least 2GB of RAM for web applications, and scalable bandwidth. Support availability is crucial for quick resolutions.
C. Registering a Domain and Selecting Your Linux Distro (Ubuntu)
Choose a domain via our domain registration portal and install Ubuntu—a beginner-friendly and well-supported Linux distribution.
3. Accessing Your Linux VPS via SSH
A. What Is SSH, And why Is It Important?
SSH (Secure Shell) allows you to securely access and manage your VPS via a command-line interface.
B. SSH Client Options (PuTTY, macOS Terminal)
Windows users can use PuTTY, while macOS and Linux users can connect directly via Terminal.
C. Generating SSH Keys
Use ssh-keygen to generate a key pair for passwordless and more secure login.
D. How to Connect to Your VPS for the First Time
Use the command “ssh root@your-vps-ip” and enter your password. Replace “your-vps-ip” with your server’s IP address.
E. Switching to Root or Creating a Sudo User
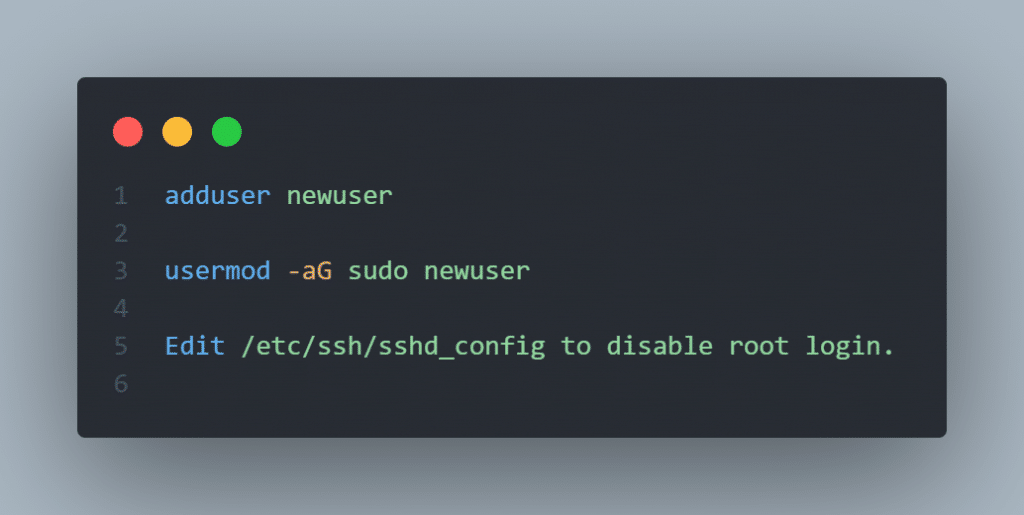
After logging in, you can switch to root with sudo -i or better, create a new sudo user for safety using adduser yourusername and usermod -aG sudo yourusername.
4. Initial Server Setup & Best Practices
A. Updating Your System (apt-get update && upgrade)
Keep your server secure and updated using:
sudo apt update && sudo apt upgrade -yB. Setting the Hostname and Timezone
Use the following command:
hostnamectl set-hostname and timedatectl set-timezone Asia/Kuala_Lumpur.C. Creating a New User and Disabling Root Login
Enhance security by using:

D. Configuring UFW Firewall
Enable UFW and allow necessary ports:
sudo ufw allow OpenSSH

sudo ufw enable
E. Installing fail2ban for Brute-Force Protection
sudo apt install fail2ban

Fail2ban monitors log files and bans suspicious IPs
5. Installing a Web Server (Apache/Nginx)
A. Choosing Between Apache and Nginx
Apache is easier for beginners, while Nginx offers better performance under heavy load.
B. Step-By-Step Installation and Testing
sudo apt install apache2

sudo systemctl status apache2
Access your server IP in a browser to test.
C. Creating a Virtual Host File
Create a new config file under /etc/apache2/sites-available/yourdomain.conf and configure your server blocks.
D. Placing Your Website Files Correctly
Place your site files in /var/www/yourdomain and set permissions accordingly.
E. Restarting and Enabling Your Web Server
sudo systemctl restart apache2

sudo systemctl enable apache2
6. Setting Up MySQL and PHP (LAMP Stack Option)
A. Installing MySQL Server and Securing It
sudo apt install mysql-server

sudo mysql_secure_installation
B. Installing PHP and Required Modules
sudo apt install php libapache2-mod-php php-mysqlC. Testing PHP Processing With info.php
Create a file in /var/www/html/:
<?php phpinfo(); ?>Visit your-vps-ip/info.php in a browser.
D. Creating and Configuring Databases
Use mysql -u root -p to log in and create your database:
CREATE DATABASE mydatabase;7. DNS and Domain Configuration
A. Understanding DNS Basics
DNS translates your domain name to your VPS IP address.
B. Setting A and CNAME Records for Your Domain
Use your domain registrar’s dashboard to point the A record to your server IP.
C. Using Malaysian DNS Providers or Cloudflare
Consider Cloudflare for free DNS and extra security, or local DNS for lower latency.
D. Propagation Time and Troubleshooting
DNS changes can take up to 48 hours. Use tools like dnschecker.org to monitor.
8. Securing Your VPS and Website
A. Installing and Configuring SSL Using Let’s Encrypt
sudo apt install certbot python3-certbot-apache

sudo certbot --apache
B. Enabling HTTPS Redirection
Certbot auto-configures HTTPS. Manually update Apache configs if needed.
C. Setting Automatic Security Updates
Install unattended upgrades:
sudo apt install unattended-upgradesD. Backing Up Your Server Regularly (rsync, cron)
Schedule backups using cron jobs with rsync or other backup tools.
9. Deploying Your First Website
A. Uploading Website Files via SFTP
Use FileZilla or command-line SFTP to upload to /var/www/yourdomain.
B. Setting Permissions and Ownerships
sudo chown -R www-data:www-data /var/www/yourdomainC. Configuring the Web Server to Serve Your Domain
Enable your virtual host:
sudo a2ensite yourdomain.conf

sudo systemctl reload apache2
D. Testing Everything Live (Load Time, Access)
Verify your site loads, DNS resolves, and SSL works. For WordPress users, see Installing WordPress on VPS.
10. Final Thoughts and Ongoing Maintenance
A. VPS Checklist for Malaysian Users
Ensure updates, backups, firewalls, and SSL are active. Review our Linux VPS security guide.
B. Monitoring Tools (Uptime Robot, Netdata)
Use tools like UptimeRobot, Netdata, or Nagios for performance and uptime alerts.
C. When to Scale or Upgrade Your VPS
Monitor RAM/CPU via htop. Upgrade when resource usage consistently nears 80%.
11. Where to Get Help (Forums, Communities)
Visit Ubuntu forums, Stack Overflow, or local tech groups for support.
By following this comprehensive Linux VPS setup guide, you can confidently host and manage your website in Malaysia. With proper setup, security, and ongoing maintenance, your VPS can support scalable and secure web projects tailored to local needs.


Leave a Reply