If you've ever created a website using WordPress, you've probably heard of cPanel. But what is cPanel exactly? How do you find it? And how do you use its tools? Even though cPanel is mainly for technical users, understanding its basics can help anyone running a website.
You can solve minor website problems and save time and money with just a few clicks. This cPanel guide will explain what cPanel does and why it is functional. We'll then walk you through this cPanel user guide about how to use cPanel for beginners and utilize it to establish a subdomain, set up WordPress, and create email accounts.
- Chapter 1: Understand cPanel
- Chapter 2: How to access cPanel?
- Chapter 3: Domain Management
- Chapter 4: Files Management
- Chapter 5: How To Install WordPress with cPanel?
Chapter 1
cPanel Overview
In the first chapter of our cPanel guide, we will cover cPanel overview, including what is cPanel how it works, and its reasons for widespread use.
What Is cPanel?
cPanel, a control panel, helps you perform different website tasks. Web hosts mainly provide it, which works automatically at the back end. It allows you to use technologies like WordPress, email accounts, subdomains, SSL certificates, and more.
Many users in the WordPress community use cPanel to install WordPress on their websites. Some web providers, such as WPEngine, will install and administer WordPress for you, but others utilize cPanel or comparable software.
What You Can Do With cPanel?
Using cPanel can help you quickly do many important things for your website. Here are some essential tasks you can do with cPanel:
- Install software like WordPress or Drupal.
- Create and manage email accounts.
- Manage your domain and subdomains.
- Install an SSL certificate for security.
- See how many people visit your site and how much data is used.
- Manage your files.
- Access your site's databases.
- Create and manage email accounts.
- Backup and manage your databases.
- Manage users.
- Keep your passwords and site secure.
Without cPanel, managing a website or server would be difficult for anyone who isn't a technical expert. Most shared hosting services and managed options use cPanel as their primary control center. However, managed WordPress hosts usually have their control panels.
Why Is cPanel So Popular?
Many websites now utilize cPanel, a popular website management tool. Its graphical user interface makes it one of the first interfaces designed with ease of use in mind for this kind of application. cPanel is generally purchased by web hosting corporations rather than individual clients.
Web hosts pay for it and provide cPanel VPS in their hosting plans for consumers to utilize. cPanel is frequently updated to accommodate the most recent online services, putting it ahead of its competition. People generally like using cPanel, so it's essential for hosting companies to offer it.
Chapter 2
cPanel Guide to Access cPanel
This chapter of the cPanel guide will discuss the top methods for logging in to cPanel, using the interface and navigation bar, and recognizing the homepage.
How do you log into cPanel?
Your web server provides you with a website management tool known as cPanel. Most web providers include a link to cPanel in your welcome email or when you log in. If you can't find it, there are alternative options for accessing your cPanel dashboard. You may put a specific address into your web browser's address bar.
Type the following into your browser's address bar:
- If your website does not have an SSL certificate, enter https://websitename.com:2082.
- Enter https://websitename.com:2083 if your website is SSL-certified.
- Use the IP address of your website, such as https://10.10.10:2083, if it is brand-new.
If your DNS records have stayed the same, the above procedures will not function.
Enter your cPanel credentials:
Enter your username and password when you reach the cPanel login page. When you join your hosting business, they will offer you with them. Contact your hosting provider's customer service for assistance if you need help discovering them. You will now have access to your cPanel dashboard.
Interface
To start, go to the website link provided and sign in using your cPanel username and password. If you ever need assistance, you can find helpful guides on every page of cPanel. Look for them at the top of the screen. For instance:
- After logging in, you should get a similar page.
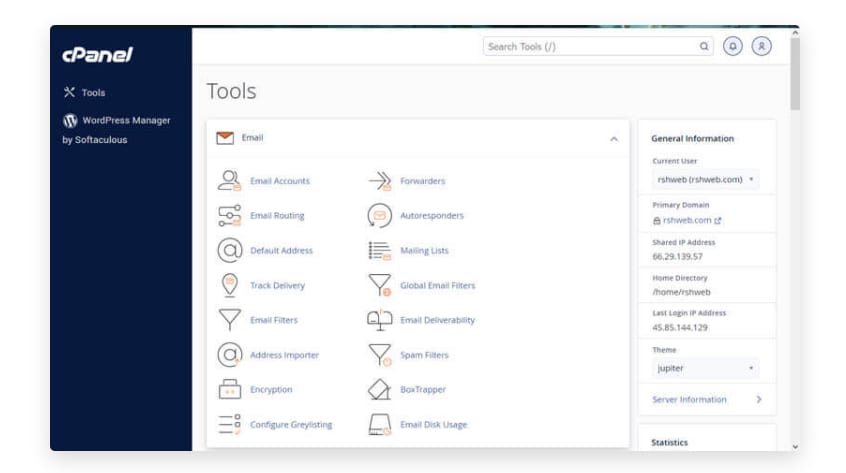
- This is the latest cPanel version. It's like a new look called Jupiter.
Navigation Bar
- The top right corner of the screen has a navigation bar. It has a search box, a link for your settings, a bell for notifications, and a link to log out.

- The search box helps you quickly find essential features in cPanel, making it easier to use.
- By clicking the user preferences link, you can change your password language, update your contact information, and reset page settings easily.
- The notifications bell displays updates about your hosting setup, like messages from RSH Web Services.
- Clicking the logout link will log you out of cPanel. For security reasons, it's essential always to log out when you're done using cPanel.
Reorganizing cPanels Homepage
- You can close parts of the homepage by clicking the up or down arrow at the top right of each section to make it smaller.
- You can move entire sections by dragging and dropping them. This helps you organize your most important sections at the top, making them easier to access.
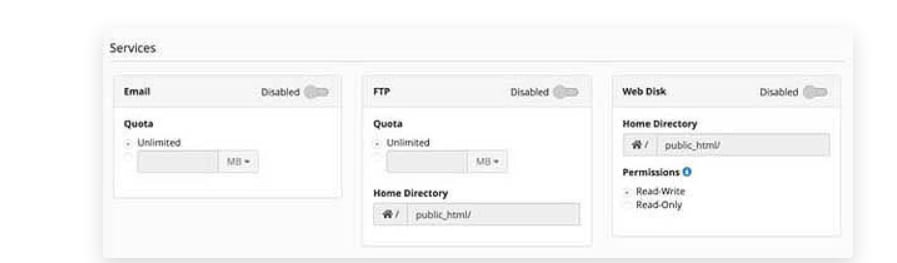
- You can use email to turn on or off someone's email account and decide how much space they can use.
- FTP lets you decide if people can or can't connect to your hosting through FTP. You can pick which folder new users can see and limit how much space they can use.
- Web Disk permissions are for your most essential admins. 'Read Write' lets users do anything in a folder, like deleting files. 'Read Only' lets them read, download, and see files.
Chapter 3
Domain Management
In this chapter, we go through domain management, managing domain names, and adding new ones.
Managing Domain Names
The Domain section of cPanel allows you to manage your website in many ways. You can add a new domain name, work with existing domains, set up subdomains, and create basic web pages for your domains. This section helps you organize and control your online presence.
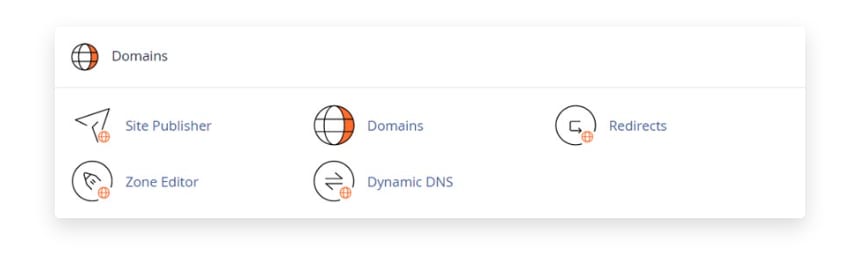
Adding a New Domain Name
- Adding a domain name to your cPanel is simple. Simply click on Add-On Domains.
- An add-on domain is just another name for a website. It allows you to establish several websites using the same control panel.
- When you select Add-on Domains, you must enter your new domain name and further information.
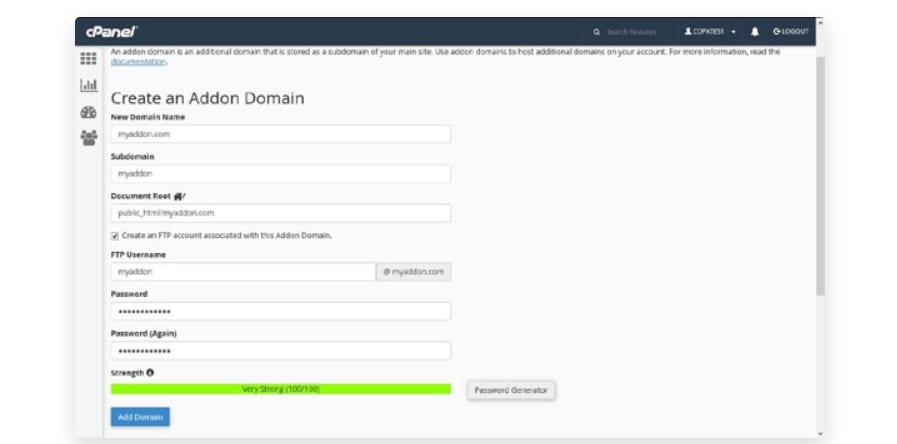
- Your domain name serves as the address for your website.
- When you register a domain, you will receive the exact name you specified.
- Sometimes, you notice "WWW." before a domain name, although it is not required when working with domains.
- Subdomains are extensions of your primary domain that may be used for other website areas. When you input your domain name, the subdomain is filled up immediately.
- Your website's files are kept on the server under the document root. This is usually adjusted automatically, but you can change it if necessary.
- Click "Add Domain" to complete the setup.
Email Accounts and Settings
A benefit of having a cPanel-enabled website is that you may create customized email addresses for your domain name.
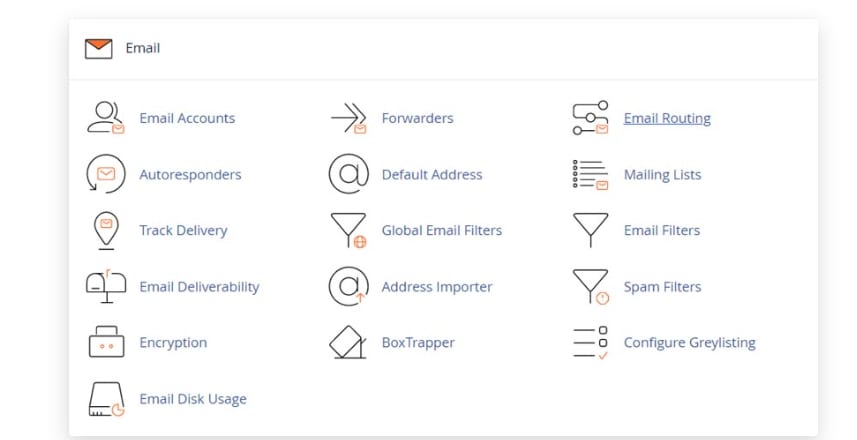
Here, you can create new email accounts, configure email forwarding, utilize automated email answers, handle spam, and much more.
Setting Up an Email Account
To set up a new email account, just follow these steps:
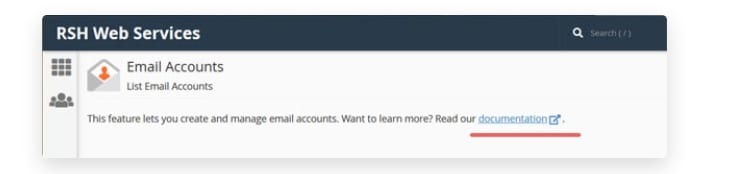
- Click on "Email Accounts."
- You'll see a screen that says, "Add Email Account.”
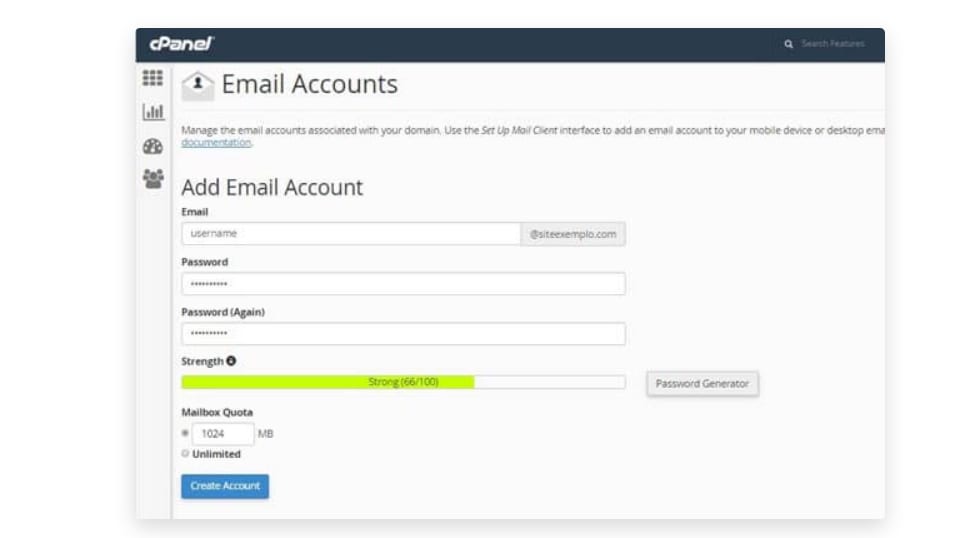
- Enter your username, like 'admin' or your name.
- Choose your domain from the list.
- Create a strong password.
- Decide how much storage space you want for your mailbox. Remember, emails occupy your website, so limiting the size is wise. Around 500MB is a good amount.
- Once you've done this, your new email will appear in the list of your email accounts.
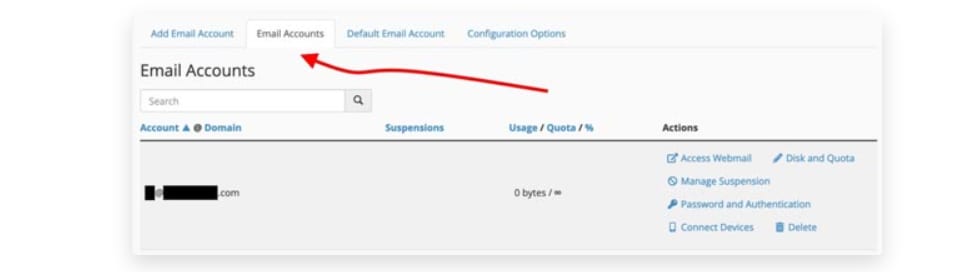
- You can control everything, like the password, how much you can use, and other essential things.
Using Your Email
Once you've set up your email account, you'll have two main options for handling your emails:
- Set up your email with a client such as Gmail, Apple Mail, Outlook, or anything similar.
- Use Webmail, which lets you access your email from a web browser.
1. Configure Your Email Locally
- Click 'Access Webmail' next to your email address to check your email.
- This will take you to a new part of the computer. Look for the words 'Mail Client Automatic Configuration Scripts.' It might look like this.
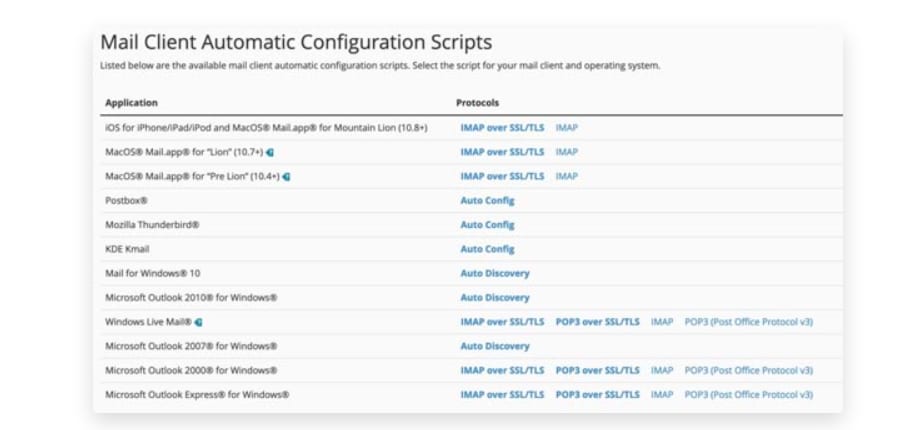
- If you need help setting up your email, check if your email client is listed below.
- If it is, click the link for instructions.
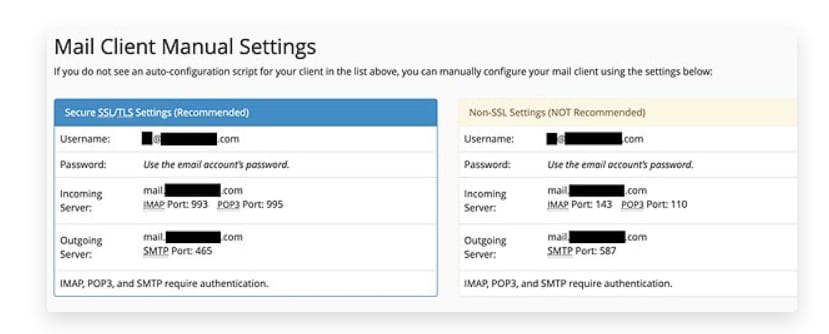
- If your client isn't listed or you prefer to set up your email manually, scroll down to the 'Mail Client Manual Settings' section.
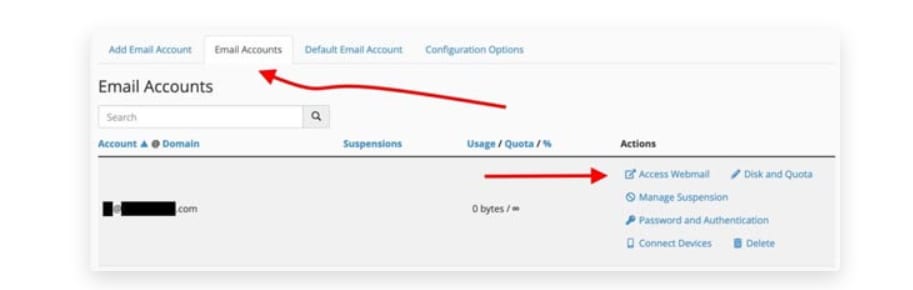
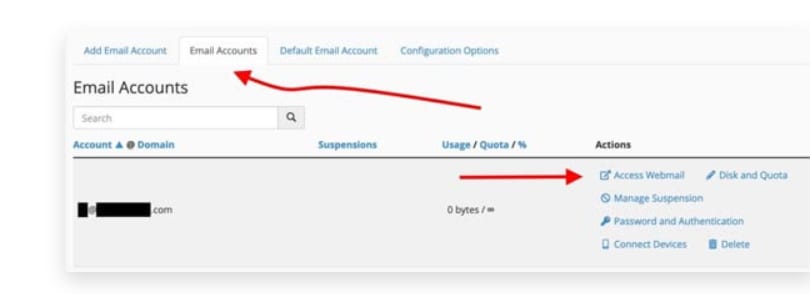
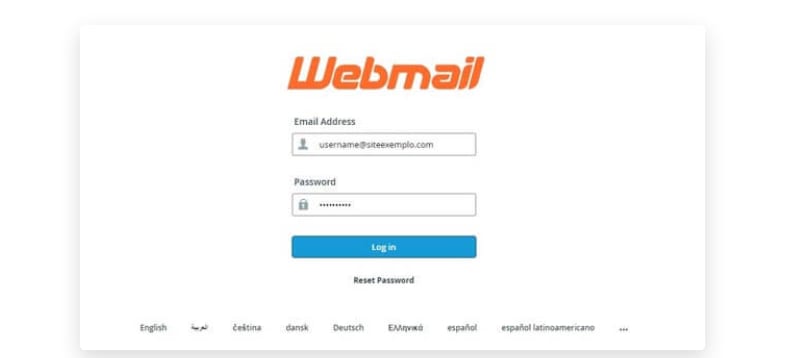
2. Accessing Your Webmail
To access your webmail online, follow these steps:
- Go to your email service provider's website.
- Look for the "Email Accounts" section.
- Find your email address and click on "Access Webmail."
- Next, choose one of the webmail programs you see. Or, if you want a different one, you can add it using Softaculous. Our favorite is RainLoop Webmail.
- You can also access your email from a web browser. Just go to YOURDOMAIN webmail, and you'll see your email there.
Chapter 4
Files Management
In this chapter, we will examine file management through cPanel. We are giving you a single copy of cPanel; keep reading.
Managing Your Files
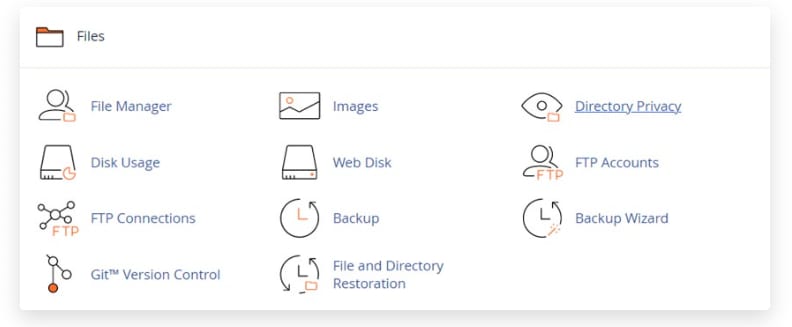
You may upload files, create website backups, and manage your files using File Transfer Protocol (FTP) via cPanel's |FILES| area. FTP stands for File Transfer Protocol, which allows you to transfer data between your computer and your website.
- To handle files on your website, you may use an FTP application or CPanel's File Manager, which allows you to see and manage files straight from your web browser.
- Log in to an FTP application using the same username and password you use for cPanel. You can check your FTP accounts in the |FTP Accounts| section of the FILES section in cPanel. Your main FTP account should be listed under Special FTP Accounts.
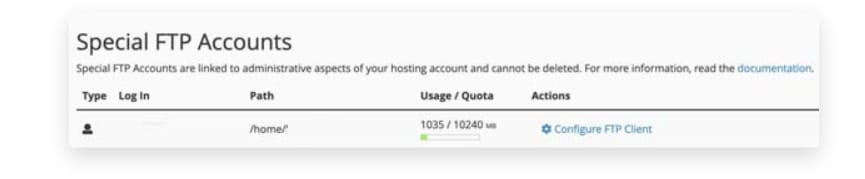
- Your main FTP account can access the main folder where your website is located. Remember to put files in the WWW or /home/user_name/public_html folder when you upload files.
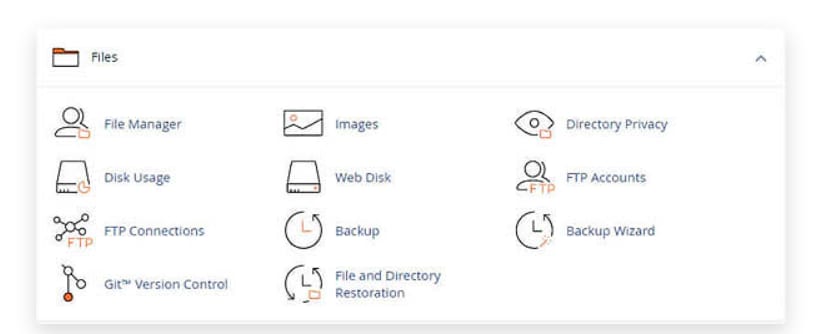
Using the File Manager
- Instead of utilizing an FTP program, the File Manager allows you to manage the files on your website directly from cPanel.
- To begin, click the File Manager icon (seen in the image above). The central part of the File Manager will appear.
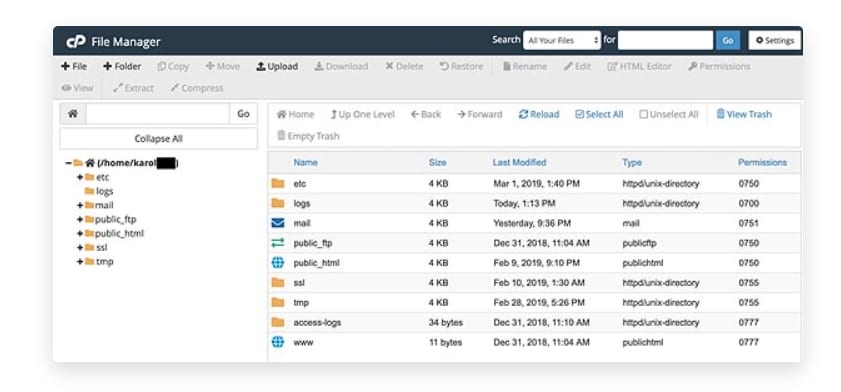
- This is like your website's filing cabinet. You can view, change, or remove all the files on your website here. However, you must proceed with extreme caution when making any adjustments.
- Here are a few items to note in this area. On the left side, you'll notice your primary folder (the big one) and various smaller folders (as seen in the image).
- The folder contents you selected will be shown in the center of the screen.
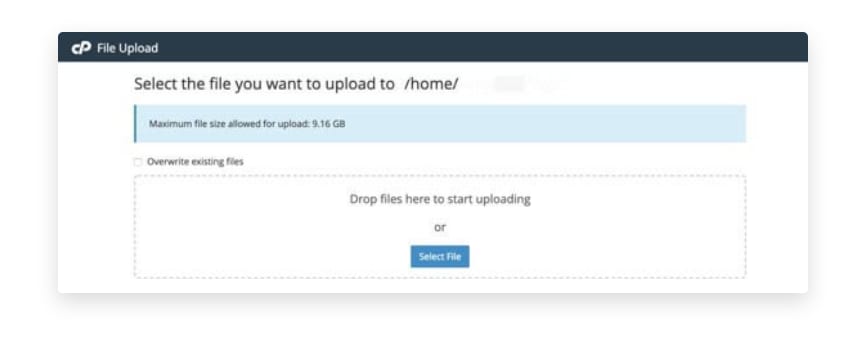
Uploading Files Using File Manager
- To place a file in a folder, first locate the folder where you want to put the file.
- Then click the Upload icon at the top.
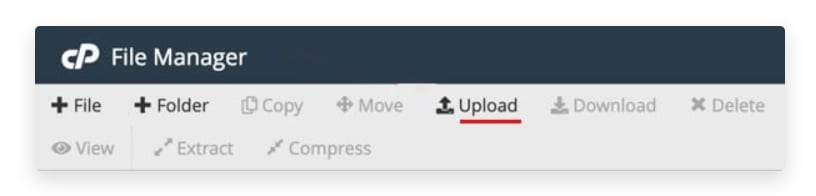
- A file has to be transferred from your computer to the website. You should click on the file, hold it, and then drag it to the webpage.
- If it doesn't work, locate the file on your computer and choose it for upload.
- Once you've uploaded the file, reload the page or the entire website to see it.
Chapter 5
How To Install WordPress with cPanel?
Well, we are here. This is the last chapter of our cPanel guide, covering the steps of how to set up a WordPress website in cPanel.
Installing WordPress cPanel
Softaculous is a valuable tool that allows you to easily install web apps on your website. It has several popular apps, including WordPress, a content management system. Softaculous is frequently used in cPanel, a hosting control panel since it simplifies the installation of online applications. Here's how to install WordPress via Softaculous on cPanel:
Step 1: Access Softaculous
To get started with the installation, follow these simple steps using Softaculous on CPanel:
- Open your cPanel account.
- Look for the SOFTWARE section.
- Select WordPress Manager by Softaculous from the options available.
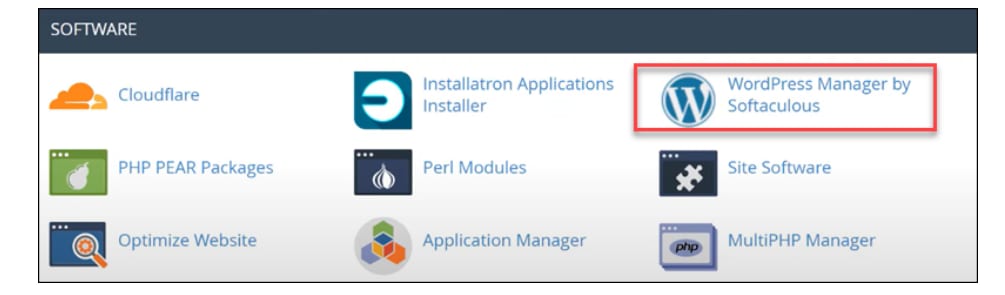
- Now open it and click on “install.”
Step 2: Choose the Installation URL
In the part about Software Setup, follow these steps:
- Pick a way to connect. Here, we'll use HTTPS
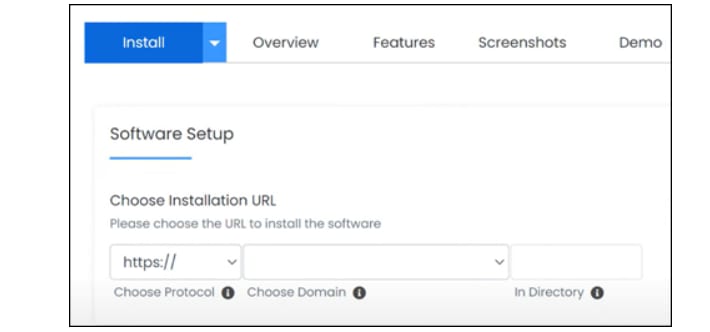
- Choose the name for your website from the list that drops down.
Step 3: Set Up the Admin Account
First, let's go to the Admin Account part. Here's what you do:
- Pick a username that you like.
- Think of a password, and make sure it's super firm!
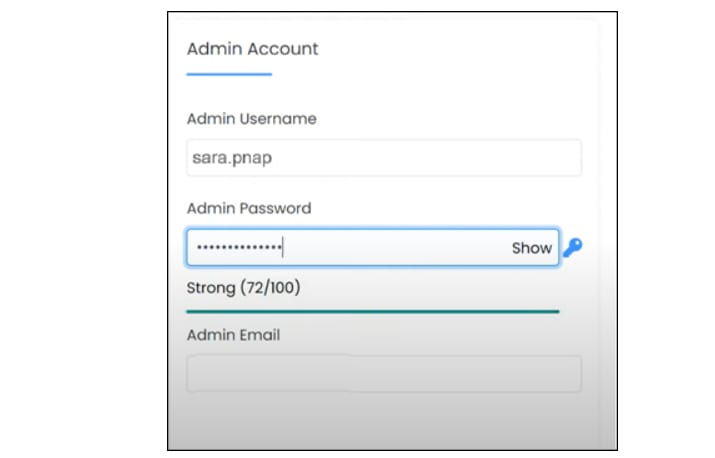
- Now, set up your admin email. You can use any email that works, even if it's not connected to a particular website.
Step 4: Adjust the Site Settings
- When you set up your website, the installer will suggest a name (like 'My Blog') and a description (like 'My WordPress Blog').
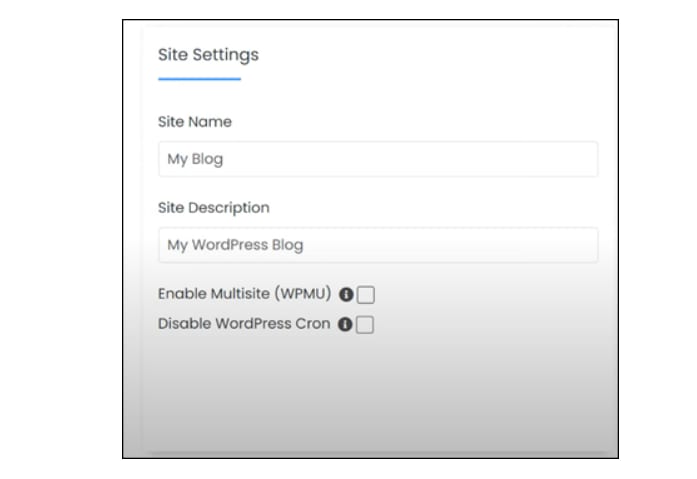
- You should change these to match your website's name and what it's about. You don't need to change anything else.
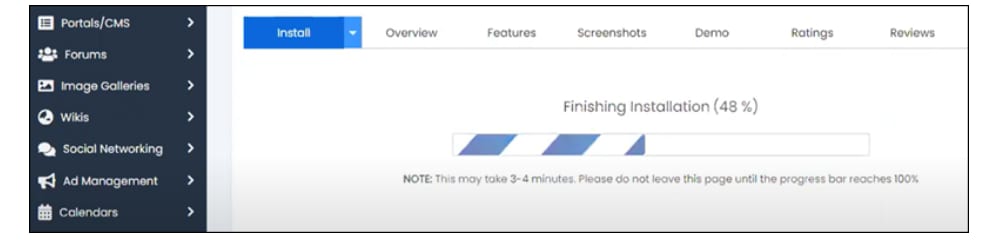
Step 4: Finish the Process
- To finish setting up, just scroll down and click on "Install." This may take time.
- Once it's done, you'll see a message confirming the installation.
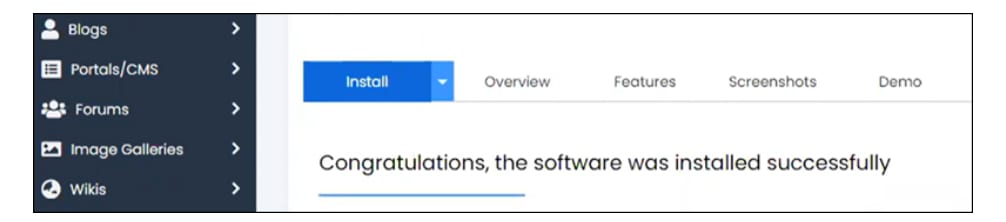
- The installer will give you the website address to visit your new WordPress page immediately.
Conclusion
That's all about the cPanel guide! Even though it may seem complicated at first, it's easy once you get used to it. In this cPanel guide, we discussed how cPanel works and its different features. We also showed you how to install WordPress, manage your domains, and upload files.